
[Flutter] List/GridView의 Item 만드는 다양한 방법
2023. 3. 12. 13:14ㆍDevelopers 공간 [Shorts]/Frontend
728x90
반응형
<분류>
A. 수단
- OS/Platform/Tool : Linux, Kubernetes(k8s), Docker, AWS
- Package Manager : node.js, yarn, brew,
- Compiler/Transpillar : React, Nvcc, gcc/g++, Babel, Flutter
- Module Bundler : React, Webpack, Parcel
B. 언어
- C/C++, python, Javacsript, Typescript, Go-Lang, CUDA, Dart, HTML/CSS
C. 라이브러리 및 프레임워크 및 SDK
- OpenCV, OpenCL, FastAPI, PyTorch, Tensorflow, Nsight
1. What? (현상)
ListView(
  padding: const EdgeInsets.all(8),
  children: <Widget>[
    Container(
      height: 50,
      color: Colors.amber[600],
      child: const Center(child: Text('Entry A')),
    ),
    Container(
      height: 50,
      color: Colors.amber[500],
      child: const Center(child: Text('Entry B')),
    ),
    Container(
      height: 50,
      color: Colors.amber[100],
      child: const Center(child: Text('Entry C')),
    ),
  ],
)
사실 ListView나 GridView를 구현함에 있어서 Children:[]에 넣을 Widget들은 위처럼 Container등 다양한 위젯으로 채워넣을 수 있습니다.
하지만 Conventional 한 방법 혹은 더 안정적인 방법으로 List Item을 구현하는 것은 많은 데이터를 직관적으로 보이도록 도울 수 있기 때문에 다양한 방법을 소개하고자 합니다.
2. Why? (원인)
- X
3. How? (해결책)
- BoxDecoration()을 활용 : 아래 예시는 AnimatedContainer() 혹은 Container()에서 제공하는 파라미터인 decoration을 활용하는 방법입니다. 이 방법의 child는 실제 넣고 싶은 Text() 등을 넣고, child가 차지 하는 공간 주변을 BoxDecoration()을 통해 꾸며주는 방법입니다.
AnimatedContainer(
    duration: const Duration(milliseconds: 300),
    margin: const EdgeInsets.all(5),
    width: 200,
    height: 45,
    decoration: BoxDecoration(
      color: condition? Colors.white70 : Colors.white54,
      borderRadius: condition? BorderRadius.circular(15): BorderRadius.circular(10),
      border: condition? Border.all(color: Colors.deepPurpleAccent, width: 2): null,
    ),
    child: Center(
      child: Text(
        ListNames[index],
        style: GoogleFonts.laila(
                fontSize: 30,
                fontWeight: FontWeight.w500,
                color: condition == index? Colors.black: Colors.grey),
      			),
    	),
    ),
),

Container(
    margin: const EdgeInsets.symmetric(vertical: 8, horizontal: 4),
    width: 400,
    height: 100,
    decoration: BoxDecoration(
      shape: BoxShape.circle,
      color: condition ? Colors.black : Colors.grey
  	),
    child : Container()
);- ListTile()을 활용 : 타일 형태로 구현 하는 것입니다. leading(왼쪽에 넣고 싶은 것) and trailing(오른쪽에 넣고 싶은것) 파라미터, 그리고 title과 subtitle등의 주어진 파라미터를 활용해 구현할 수 있어 편리합니다.
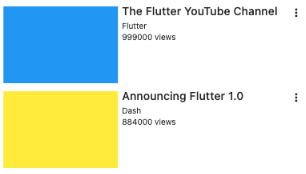
ListTile(
    onTap: () {
      query = ListNames[index];
      Navigator.of(context).pop(query);
    },
    leading: Image(
      image: CachedNetworkImageProvider(ListPathNames[index]),
    ),
    title: Text(
      '${ListNames[index]}',
      style: Theme.of(context).textTheme.bodyText1,
    ),
);- Card() 를 활용 : 카드 형태의 위젯으로 Item을 구현하는 데 많이 쓰이는 위젯입니다. 모서리나 그림자를 통해 실제 카드처럼 만들 수 있기 때문에 자주 사용하는 것 같습니다.

Center(
  child: Card(
    child: SizedBox(
      width: 300,
      height: 100,
      child: Center(child: Text('Elevated Card')),
    ),
    shape: RoundedRectangleBorder(
    	borderRadius: BorderRadius.circular(16.0),
    ),
    elevation: 4.0,
  ),
);
- IconButton() 활용 : Icon을 활용해 구현할 때 주로 사용하는 위젯입니다. 실제 디자인한 아이콘을 넣고, 눌렸을 때 어떤 동작을 할지 등을 구현할 때 유용합니다.

IconButton(
    padding: EdgeInsets.zero,
    alignment: Alignment.centerLeft,
    icon: const Icon(Icons.android),
    color: Colors.white,
    onPressed: () {},
),
728x90
반응형
'Developers 공간 [Shorts] > Frontend' 카테고리의 다른 글
| [Flutter] Future Builder를 활용해 Display하기 (1) | 2023.03.17 |
|---|---|
| [Flutter] 미리 정해놓으면 좋은 것들 (Theme, Icon, Block, Sound...) (0) | 2023.03.12 |
| [Flutter] Custom Scrollable Tabbar 구현하기 (0) | 2023.03.12 |
| [Flutter] 카카오 API 활용하기 위한 셋팅 (0) | 2023.03.12 |
| [Flutter] List, ListView, ListView.Builder 차이 (1) | 2023.03.11 |